
A clear, watertight seal around your shower screen is critical to prevent leaks that can cause water damage in your bathroom. The rubbers seals that border your shower glass perform this vital function, but over time, residue from soap, minerals, and moisture can build up. If not properly cleaned, this residue attracts mould, mildew, and bacteria growth, causing deterioration of the seals. Damaged or worn seals allow water to seep through, drip down the walls, and soak into flooring.

Regularly cleaning your shower screen seals is essential maintenance to extend their lifespan and ensure they form a tight barrier against leaks. This prevents thousands in repairs down the road. In this article, we will discuss what shower screen seals are made of, signs they need cleaning, the proper techniques and cleaning agents, how often you should maintain them, and tips to prevent future buildup.
With simple, regular care, your seals will resist mould and last for years before needing replacement. Vibrant, fresh seals also maintain a cleaner, more hygienic shower environment. Following these best practices for shower screen seal care will protect your bathroom from leaks, preserve the seals, and prevent time-consuming repairs.

Why Cleaning Your Shower Screen Seal is Essential
Cleaning your shower screen seal regularly is imperative for health, maintenance, prevention of major repairs, and aesthetics. Let’s learn more about the importance of cleaning your shower screen seal strip regularly.
Preventing the health risks of mould and mildew buildup
Buildup of residues from shampoo, soap, mineral deposits and anything else your shower is exposed to collects on the seals around your shower screen. Left unaddressed, the damp environment breeds harmful mould, mildew, and bacteria.
Tainted air and surfaces increase your risk of skin and respiratory issues and contaminate your shower environment. Disinfecting the steamy enclosure ensures your health, especially for young children and those with compromised immune systems.
Prolonging lifespan of the shower screen
In addition to minimizing health hazards, disinfecting shower seals prolongs the lifespan of the rubber or vinyl compound. Mould and mildew deteriorate the seal, degrading the tightly bonded barrier that blocks water from escaping. Small leaks and seepage through damaged seals are easily prevented through routine cleaning.
Otherwise, replacing entire shower seals and screens down the road often costs in the hundreds of dollars. Cleaning your shower screen seals regularly thus saves you major expenses from repairs and restorations due to leaks and water damage.
Preventing water damage to bathroom floors and walls
Consistent cleaning also prevents warped floor tiles, stained grout, peeling wallpaper, and rotting drywall if neglected seals start to leak. Water can run along cracks and crevices, soaking into bathroom subfloors, walls, and beyond. You may need to gut and rebuild sections of your bathroom if moisture issues escalate into structural damage.
Aesthetic benefits
Finally, keeping your shower screen surrounded by fresh, bright seals simply looks better. Eliminating soap scum, hard water stains, and mildew stains maintains a gleaming shower enclosure you can feel good about. Overall, committing to routine cleaning provides health protections, extends the lifespans of seals, averts expensive repairs from leaks and water damage, and makes for an attractive bathroom space.
Step-by-Step Guide: How to Clean a Shower Screen Seal
So how to clean shower screen seal in the right way? Here’s a simple step by step guide that you can follow to get the job done.
Step 1: Preparing the Area
Start by clearing any bottles, soaps, and shampoos from the shower floor and built-in shelves. Remove any detachable parts of the shower head or accessories as well. This clears the way for scrubbing the entire enclosure.
Open any bathroom windows or turn on the vent fan to circulate fresh air during cleaning. Strong chemical odors from cleaning products make good ventilation mandatory.
Lay down old towels around the base of the shower screen to soak up excess water and prevent slipping. Use microfiber cloths, sponges, and soft-bristle scrub brushes for the various stages of cleaning. Finally, put on rubber gloves to protect your hands.
Step 2: Applying Cleaning Solutions
For routine cleaning, warm water, a mild all-purpose cleaner or dish soap, and some elbow grease can lift most buildup from seals. For tougher stains and mould or mildew growth, try homemade solutions first before resorting to stronger commercial cleaners.
Make a paste from baking soda and water and apply seals using a soft-bristle brush or sponge. The grittiness helps lift residue while the alkaline soda kills mould and freshens.
Straight undiluted white vinegar also dissolves soap scum and mineral deposits effectively. Spray it directly onto seals and let it sit for a few minutes before scrubbing.
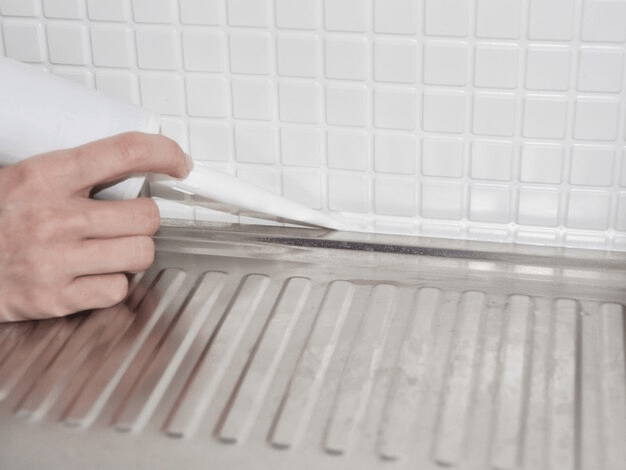
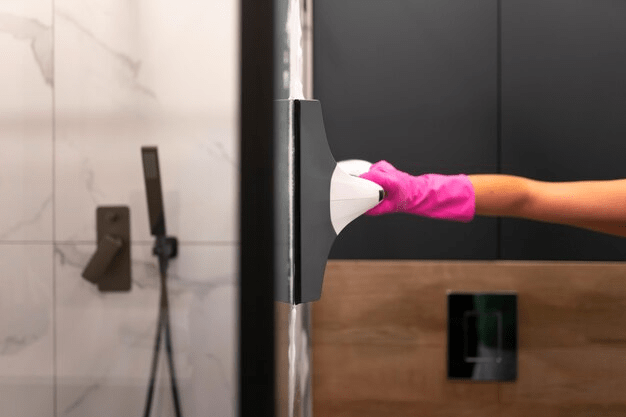
Step 3: Scrubbing the Seal
Scrub seals gently in circular motions using your chosen cleaning solution. Apply more cleaner and let it soak again if buildup persists. Eventually, stains will lift, and seals will reveal their original clear, white, or colored appearance.
Take care not to abrade or puncture seals with aggressive scrubbing. This can damage their watertightness and necessitate early replacement. Stick to soft-bristle brushes, gentle sponges, or microfiber cloths.
Step 4: Rinsing and Drying
Once scrubbed entirely, rinse seals thoroughly with clean water to remove all residues. Use a squeegee tool to direct water into the shower drain and wipe down all interior glass and tile surfaces as well.
Finally, go over seals and the shower enclosure with a clean microfiber towel, soaking up all moisture. Leaving standing water invites re-growth of mould and mildew. Make sure to get into crevices and corners.
With these steps for preparation, cleaning, rinsing, and drying, you can maintain cleaner, longer-lasting shower screen seals. Repeat every few weeks for freshness and hygiene.
How to Clean a Shower Screen Seal Strip
Now you have a basic idea on how to clean a shower screen seal. With that in mind, you should also figure out how to clean the shower screen seal strip. This section can help you with it.
Differences between standard seals and seal strips
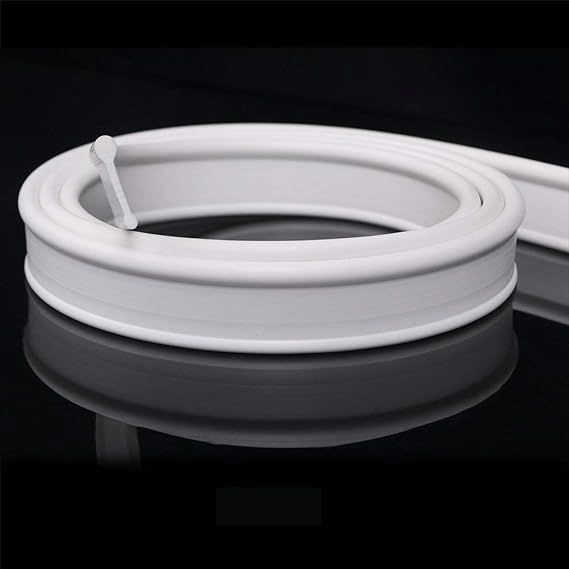
Standard shower screen seals are typically flat pieces of vinyl, rubber, or silicone that adhere around the borders of the glass panel or door. Seal strips feature additional peaks and valleys in the material to allow more flexibility and longevity. The grooved texture better accommodates opening and closing of shower doors. It also allows for a tighter fit to prevent leaks.
Special considerations to follow with rubber or silicone strips
Use a toothbrush and toothpick to gently dislodge smaller grime deposits if needed after vacuuming. Avoid metal tools like knives or scrapers than can scratch or puncture the rubber.
For routine cleaning, moisten the textured strip and apply a non-abrasive bathroom cleaner containing bleach alternative or other antimicrobial ingredients. Let it soak for 5-10 minutes. The ridges tend to harbor more stubborn soap scum and mildew than flat vinyl seals.
Use a very soft-bristle brush or microfiber cloth to gently scrub the wetted texture lengthwise with the grooves. Avoid scrubbing across the channels, which can stretch and deform the rubber. Rinse thoroughly when finished.
For strips with especially deep grooves, use an old toothbrush, pipe cleaner, or cotton swab dipped in cleaning solution to hand scrub the crevices. Let it soak deeper into the tiny cracks before wiping.
You can also mix equal parts water and white vinegar in a spray bottle to loosen soap scum and dissolve hard water deposits. Spritz the textured seal and scrub with a soft brush. The mild acidity of vinegar shines the grimy channels without wearing down the rubber over time.
When using any cleaning product, limit contact with metal fixtures to avoid discoloration. Thoroughly rinse strips after cleaning to prevent degradation from chemical residue buildup.
Techniques to remove trapped grime in grooves
When cleaning these specialty seal strips, take extra care not to snag the delicate ridges and tears. Start by vacuuming up any loose hair or particles trapped deep in the valleys of the textured strip. Otherwise, scrubbing forces debris further into the thin crevices.
Proper maintenance keeps shudder strips clear of contaminants, extends their performance life, and ensures watertightness against leaks far better than flat vinyl or rubber seals. Pay special attention to deep cleaning the intricate crevices when maintaining your shower screen’s specialty seal strips.
Tackling Stubborn Mould and Limescale
Over time, the damp environment of a shower allows mould, mildew, and limescale deposits to take hold and discolor seals no matter how vigilant your cleaning routine. This is something to keep in mind when figuring out how to clean shower screen seal.
Using vinegar-soaked cloths for overnight mould treatment
For superficial buildup, scrubbing with homemade vinegar, baking soda, or dish soap recipes helps lift stains. But for truly stubborn growths of black mould or crunchy limescale, more heavy duty treatment will be necessary.
For resilient mould staining, soak a microfiber cloth or paper towel completely in undiluted white vinegar and lay it directly over the affected seal area. The acetic acid in vinegar kills mould and lifts stains. Let it sit overnight if possible before scrubbing clean in the morning. Repeat as needed for maximum mould remediation.
Baking soda paste for scrubbing tough stains
Alternatively, make a thick paste from baking soda and just enough water to form a spreadable consistency. Apply the gritty paste to stained areas using an old toothbrush or sponge. Let it bubble on the seal for 5-10 minutes before scrubbing in circles. Baking soda simultaneously lifts, exfoliates, and deodorizes seals for freshness.
Commercial anti-limescale products
For removing years of accumulated limescale deposits around faucets and near the shower head, use a specialty plaque-fighting cleaner like Cif Power Cream or Astonish Shower Shine.
Apply the cream product following package directions, let it penetrate the mineral buildup for 15-30 minutes, then scrub away scale using a cleaning toothbrush or grout brush. Cleaners with active ingredients specifically targeting limescale make efficient work of removing cement-like hard water deposits that regular cleaners cannot touch.
With the right methods and cleaning agents, even the most tenacious mould, mildew and limescale on shower screen seals comes off with some diligent scrubbing.
When to Replace a Shower Screen Seal
If cracks, gaps, or tears develop in your shower screen seal that allow water to continually seep through, replacement is likely needed. Permanent limescale stains, embedded black mould, foul odors, and visible cracks or holes that reappear shortly after cleaning also indicate a seal that is too far gone. Fresh seals feel supple, solid, and watertight to the touch. Brittle, dried out, visibly deteriorated seals have outlived their lifespan.
How to Remove and Install a New Seal
First, use a utility knife to fully detach the worn seal from around the edges of the glass screen or shower door frame. Thoroughly clean the newly exposed surface underneath with rubbing alcohol to remove all old adhesive residue. Measure the depth and length required, then cut a piece of new silicone or rubber seal to size accordingly.
One solid piece is best rather than trying to join sections. Test fit the custom cut replacement seal first before peeling off the adhesive backing and firmly pressing into place. Use a small roller over the fresh seal to ensure strong adhesion, watertightness, and a seamless fit.
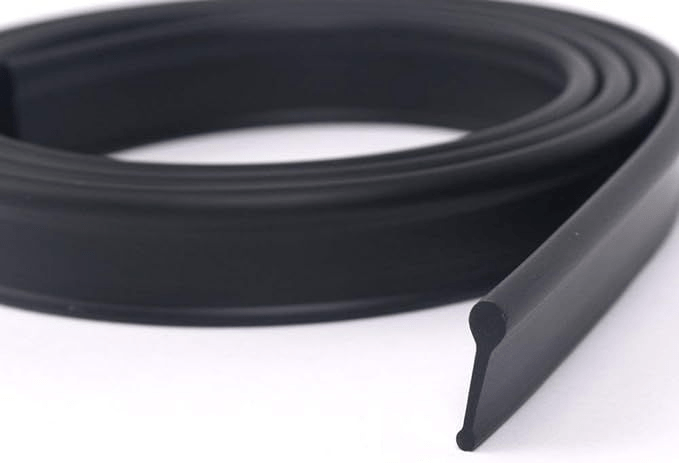
Choosing Between Silicone and Rubber Seals
Rubber seals withstand heat and humidity well over years of use. Silicone seals provide maximum flexibility and water resistance. They cost more initially but last over a decade with proper maintenance. Evaluate condition of other seals, anticipated longevity of the shower itself, and your budget when deciding between replacements.
Conclusion
Regularly cleaning soap scum, minerals, and moisture from your shower screen seals is essential preventative maintenance. Use a gentle scrubbing approach with natural cleaning agents like vinegar and baking soda for best results without damaging seals over time. Address any cracks, leaks, or visible deterioration promptly by replacing worn seals.
Choose quality silicone or rubber replacements with adherence assistance for long-lasting watertightness. By properly caring for the seals bordering your shower glass, you promote better hygiene, health, and home value while avoiding expensive water damage repairs. Visit Elegant Showers UK Online Shop now for the highest quality shower screen seals expertly customized to your enclosure.


Validate your login